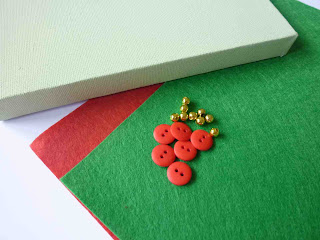
My first little handmade item was so effective and super quick to make that I thought it would be fun to share a little "how to" post. So my lovelies, here is my little tutorial on how to make a Holly Wreath Canvas should you wish to make one for yourself:
You will need:
* a mini canvas block
* a tester pot of paint
* some craft felt in christmassy green and red and matching thread
* 4 or 5 small red buttons
* 7 gold coloured mini beads
* some craft glue
Step 1
Paint your canvas block. I picked a soft green colour that complimented the colour of my felt.
Step 2
On piece of paper, draw a ring shape which is slightly smaller than the depth of your canvas block. The ring will form that base of the wreath. I used a coaster and a roll of ribbon to give me two perfect circles (one inside the other). Cut out the paper pattern.
Step 3
Using your paper pattern, cut a ring of green felt.
Step 4
Cut two more paper patterns. The first one should be a holly leaf shape, which is slightly wider than the thickness of the wreath base. The second should be a 6-petal flower shape. Cut out 18 holly leaf shapes from the green felt and 2 flower shapes from the red felt.
Step 5
Laying the two red flower shapes (one over the other so that you can see all the petals) onto the green wreath base, sew the gold coloured beads into the centre ensuring that the thread is going through all 3 layers of felt.
Step 6Start sewing the holly leaf shapes onto the wreath base, using a long running stitch. The leaves look good when they overlap slightly and randomly lay at different angles to each other.
Step 7
Continue sewing on all the leaves until you have covered the wreath base. You can then sew on the buttons to add a bit more detail to the wreath. I used just 4 buttons due to their sizes, however, more would look good too. Alterntively use red sequins for a bit more Christmas sparkle.
Step 8
Once all the detail has been stitched onto the base, glue the wreath onto the canvas block.
And there you have it. A perfect little Christmas picture ready and waiting for the festivities to begin.
Let me know if you make one too, I would love to see your version.
Have fun.
Jumbleberries xx


3 comments:
What a great tutorial, thanks for sharing :-)
Still can't persuade myself to think too much about Christmas yet though... so many birthdays still to come before then!
Gorgeous wreath. Great tutorial. Wish you were closer so you could help me with my sewing.
Have you considered using Instagram to put your lovely stuff on. Annaboo seems to get a lot of business from posting lovely pics on there. I use it all the time but just to post lovely pics I like xxxxx
Absolutely gorgeous, what a lovely idea! The button and bead details are fab, thanks for sharing!
Debbie x
Post a Comment